SET UP 3
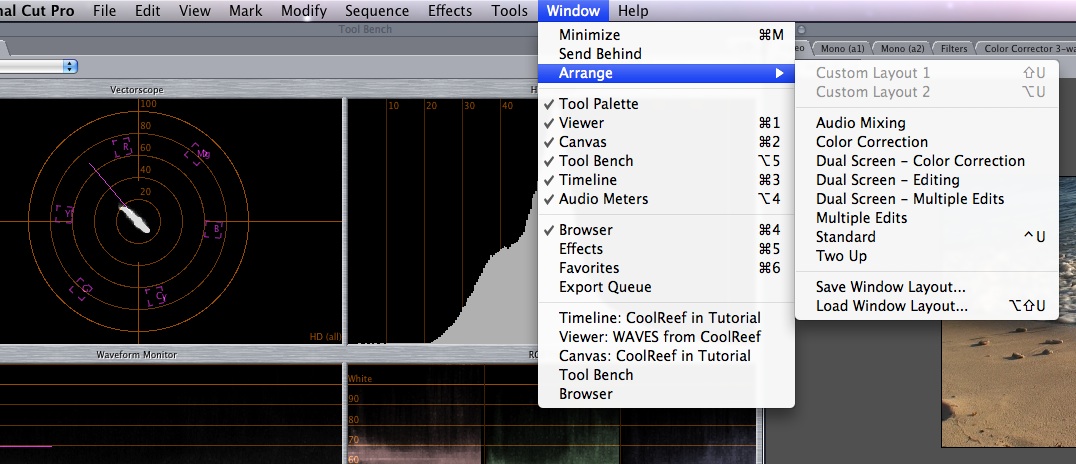
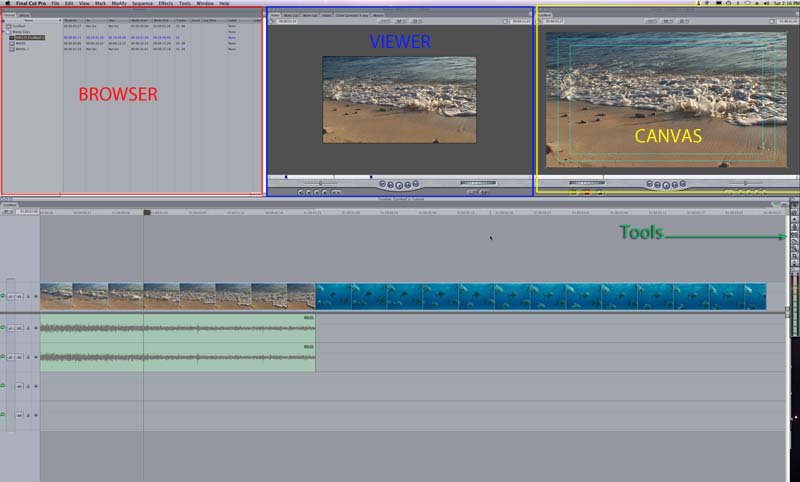
Final Cut hasa many different layouts that are tailored for various needs. Certian layouts work better for color correction for instance, though color correction can be done in any layout. It is easiest to start with the standard layout so you can see the general work area that will be mentioned. Select Arrange->Standard and you will see the layout below. The Browser is on the left, the viewer in the middle, the canvas on the right and the timeline at the bottom. The browser has all the assets (video, audio, stills) listed, the viewer will show a clip that is double clicked in the browser or the timeline, while the canvas shows where the playhead is located. If you look in the bottom section you will see a vertical line almost halfway on the waves. That is where the playhead is located at the time. If you click anywhere along the top of the timeline, the playhead will move to that point.

